Managing Trackers
A Tracker is any person who uses DTTA to track student attendance on routes.
In this section, you can see the list of Trackers that were added manually. By default, they are sorted in descending order by the date of Tracker creation. On the screen, you can see the following details:
Field | Description |
|---|---|
| First name | Name of Tracker. This field is mandatory |
| Last name | Surname of Tracker. This field is mandatory |
The number of characters in each field must not exceed 50.
The list of Trackers may be sorted in different ways by single column.
Sorting operations
by First name:-the first click the First name header sorts the list in ascending order by the first name of the Tracker
-the second click the First name header sorts the list in descending order by the first name of the Tracker
by Last name:-the first click the Last name header sorts the list in descending order by the last name of the Tracker
-the second click the Last name header sorts the list in ascending order by the last name of the Tracker
Adding Trackers
To add a Tracker:Select Trackers from the left-side navigation menu.
Click
 in the top bar of the page to open the Tracker form.
In the Tracker form, fill in the First name and Last name mandatory fields.
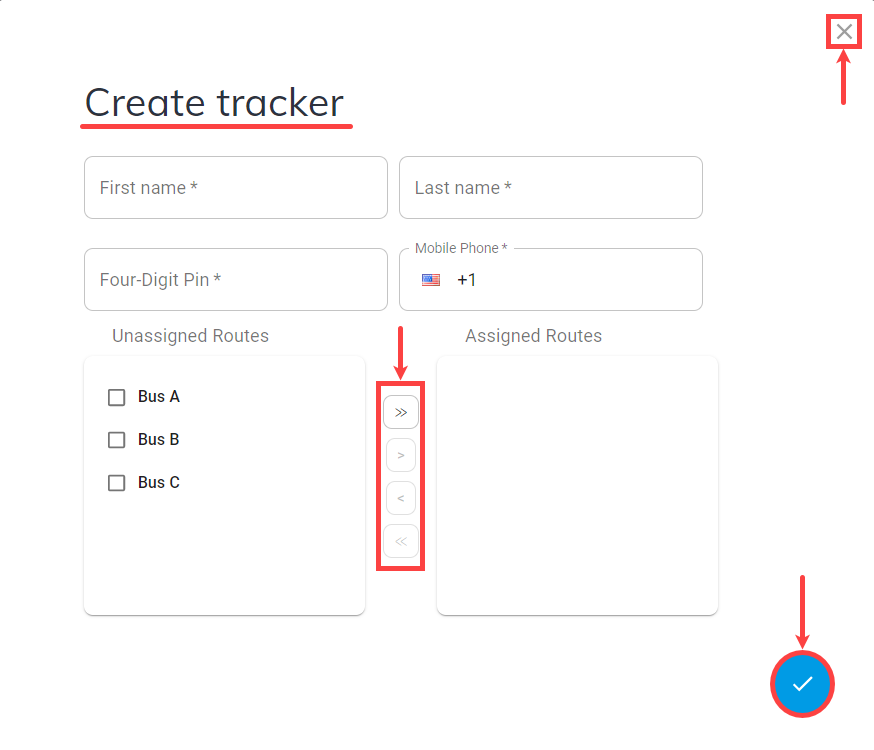
3.1 Type the phone number of the Tracker
3.2 Create and provide a mandatory 4-digit PIN. It can include only 4 digits (a different number of digits or other symbols/letters are not allowed). Save the PIN as it will become hidden after closing the Tracker form.
You can increase or decrease the entered 4-digit number by:
holding up/down keyboard controls
pressing the left mouse button on the up/down arrow
scrolling mouse wheel up/down
3.3 Specify routes
Routes:
Selection:
assigned - attached to the current Tracker
unassigned - not attached to the current Tracker
Operations with routes
to select press on disabled checkbox
to deselect press on enabled checkbox
Assigning:
to assign all routes click
to unassign all routes click
to assign selected routes click
to unassign selected routes click
Finally, in the bottom of the Tracker form, select
 .
.Selecting
saves the data and directs you back to the Trackers list.
Selecting  , in the top right corner of form, directs you back to Trackers list without saving the data.
Updating Trackers
To edit a Tracker:- Select Trackers from the left-side navigation menu.
- Choose the Tracker you want to edit by selecting the name.
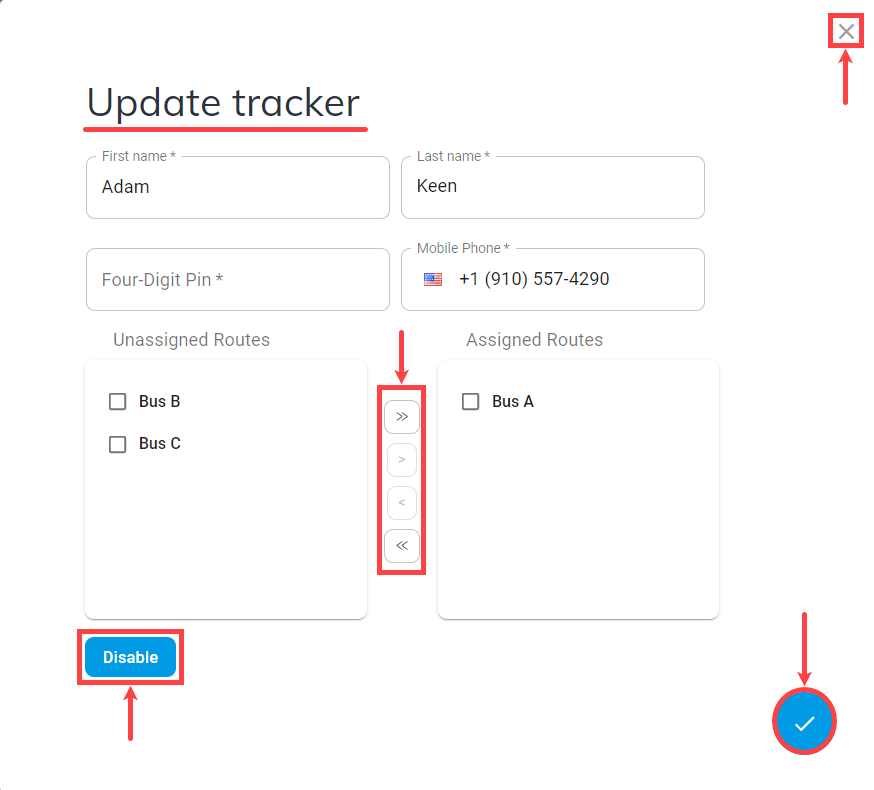
- Update required details.
3.1 Type the phone number of the Tracker
3.2 Create and provide a mandatory 4-digit PIN.
3.3 Specify routes - Change availability of current Tracker.
Trackers may be:
- Activated - Trackers that are authorized to use DTTA and complete routes
- Disabled - Trackers that are not authorized to use DTTA and complete routes
- Enable it by selecting

- Disable it by selecting

Next, in the bottom of the Tracker form, select
.Selecting
saves the data.
Selecting, in the top right corner of form, directs you back to the Trackers list without saving the updates.Close
the window after saving your edits